A2D for VS Code & Anypoint Code Builder
The A2D extension brings your A²D REST APIs, MCP servers and A2A agents into Visual Studio Code and Anypoint Code Builder (ACB). It works the same way in Cursor and other VS Code-based editors.
Prerequisites
- VS Code 1.82 or later, or Anypoint Code Builder (desktop)
- For Mule projects: the Anypoint Extension Pack (included in ACB)
- For Python, TypeScript or JavaScript projects: Python 3.10+ or Node.js 18+
- An A²D API key from Platform → API Keys in A2D Cloud (see API Keys)
Installing the Extension
- Open the Extensions view (Cmd/Ctrl+Shift+X)
- Search for A2D and select the extension published by a2d-ai
- Click Install
You can also install it from the VS Code Marketplace page, or from the command line:
code --install-extension a2d-ai.a2d-vscodeConnecting to A²D
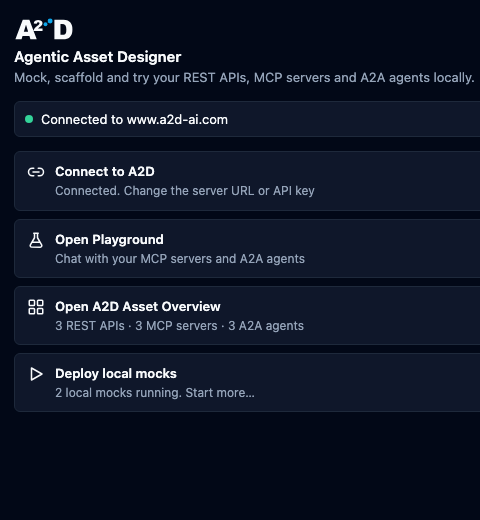
- Click the A2D icon in the activity bar. The A2D landing page opens
- Click Connect to A2D and paste your API key
- The page shows Connected to www.a2d-ai.com and how many assets you have
The key is stored in VS Code secret storage. To use a different A²D server, change the user setting a2d.url (default https://www.a2d-ai.com).
The A2D Landing Page
| Action | What it does |
|---|---|
| Connect to A2D | Set or change the server URL and API key |
| Open Playground | Open the A2D Playground in an editor tab |
| Open A2D Asset Overview | Browse your REST APIs, MCP servers and A2A agents |
| Deploy local mocks | Pick REST, MCP and/or A2A, then start local mocks for all assets of those types |
Browsing Assets
Open A2D Asset Overview (or the command A2D: Open A2D Asset Overview) shows your assets the way A2D Cloud does:
- REST APIs, MCP Servers and A2A Agents tabs, with a count and the number of running local mocks
- Card or list view, search by name, description or id, and filters for type, status and local state
- Stop all stops every running mock. The flask icon opens the Playground
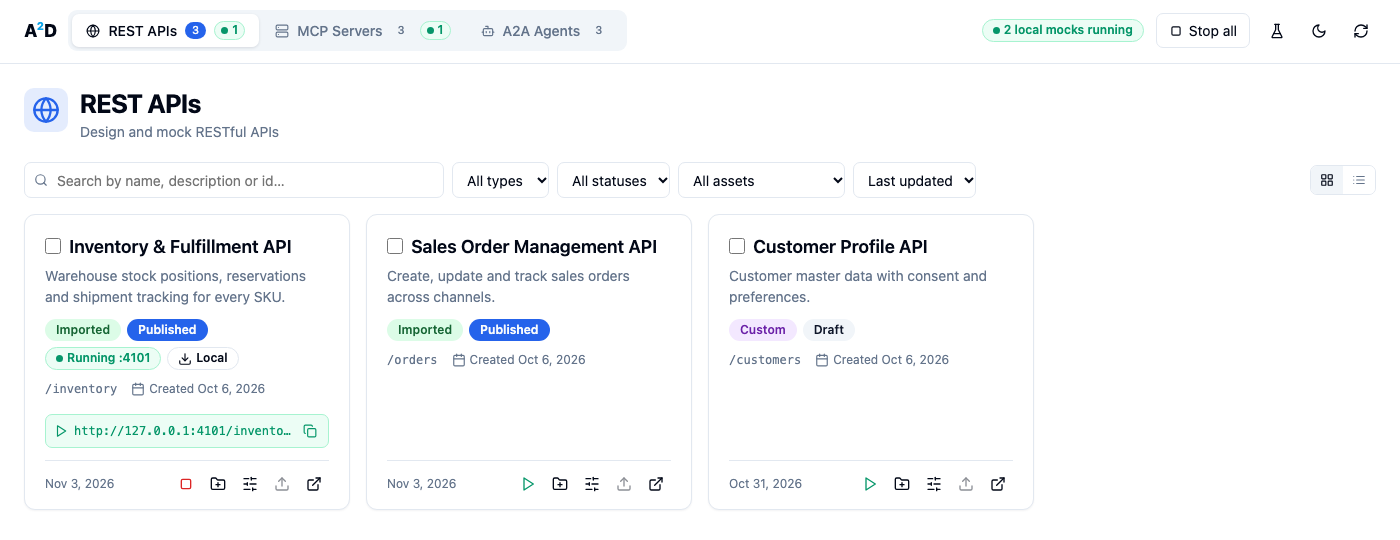
Each asset card, or a multi-selection, has these actions:
| Action | What it does |
|---|---|
| Run locally | Start a local mock on its own port. The card shows Running :port and the endpoint URL |
| Scaffold | Generate a project from the asset (see below) |
| Stop mock | Stop the local mock (only while it runs) |
| Edit mock scenarios | Open the Mock Configuration editor |
| Push to A2D | Write local scenario edits back to A²D (only when there are local edits) |
| Open in A2D | Open the asset in A2D Cloud |
Scaffolding Projects
Select one or more assets and choose Scaffold. Pick a target:
| Target | MCP | A2A | REST |
|---|---|---|---|
| Anypoint Code Builder | Mule 4 | Mule 4 | Mule 4 |
| Python | mcp SDK | a2a-sdk | Connexion (OpenAPI-first) |
| TypeScript / JavaScript | @modelcontextprotocol/sdk | @a2a-js/sdk | openapi-backend + Express |
Inside ACB the target defaults to Anypoint Code Builder. Generated projects answer with the asset’s mock scenarios until you replace them with real logic. Python and Node.js projects start with F5. For Anypoint Studio projects, use the Studio plugin.
Local Mocks and Mock Scenarios
Local mocks behave exactly like A²D’s hosted mocks, but run on your machine. Use them to develop offline, in CI, or against scenarios you are still editing. With Add to .vscode/mcp.json, an MCP mock becomes available to Copilot and other agents in your editor.
See Local Mocks & Scenarios for the details and the scenario editor.
The Playground in the IDE
Open Playground (or A2D: Open A² Playground) opens the same tester as a2playground.a2d-ai.com in an editor tab. Use it to test A²D-hosted endpoints, local mocks and your scaffolded projects. In its Local Workspace section you pick a folder, and your requests and collections are saved there in the same format as the Playground desktop app.
Next Steps
- Local Mocks & Scenarios — run and edit local mocks
- A2D Playground — everything the tester can do
- API Keys — manage the key the extension signs in with
Your A²D assets are now one click away in VS Code and Anypoint Code Builder.